User Guide
This guide provides a comprehensive example of how to use the StressSimple application effectively.
How It Works
To perform stress testing, you need to create a class named Test that extends the StressTest base class. This class is responsible for sending HTTP requests during the stress test. The Test class must implement the test method, which defines the logic for sending HTTP requests. Optionally, you can implement the interval method to specify the time interval (in milliseconds) between consecutive tests.
Key Points:
- The
testmethod is invoked repeatedly by the application to send HTTP requests to the server. - The
intervalmethod specifies the interval between consecutive tests in milliseconds. If not implemented, the default interval is 1000 milliseconds. - A test is considered a failure if an exception is thrown during the execution of the
testmethod.
Sample Test Script
import { StressTest } from './StressTest.js';

/**
 * A sample test class that extends the StressTest base class.
 * This class demonstrates how to perform stress testing by sending HTTP requests to a server.
 */
export class Test extends StressTest {
  // Counter to track the number of requests made
  private request: number = 1;

  // HTTP client instance configured with the base URL
  private cli = this.http
    .baseUrl('http://localhost:3333') // Stub server URL
    // .header('x-stub-delay', '100') // Uncomment to add a delay to all requests
    .create();

  /**
   * Executes the test by sending an HTTP GET request to the server.
   * @param userId - A unique identifier for the user performing the test.
   */
  public async test(userId: string): Promise<void> {
    // Uncomment the following line for debugging purposes
    // console.log("Test with " + userId + ' request number ' + this.request++);

    // Send an HTTP GET request to the server
    await this.cli
      .get('/some-endpoint')
      // Uncomment to send other types of requests
      // .post('Post request', { userId: userId })
      // .put('Put request', { userId: userId })
      .header('userId', userId)
      .name('stub server')
      .send();
  }

  /**
   * Specifies the interval between consecutive tests in milliseconds.
   * @returns The interval duration in milliseconds.
   */
  public interval(): number {
    return 10;
  }
}
Test Execution
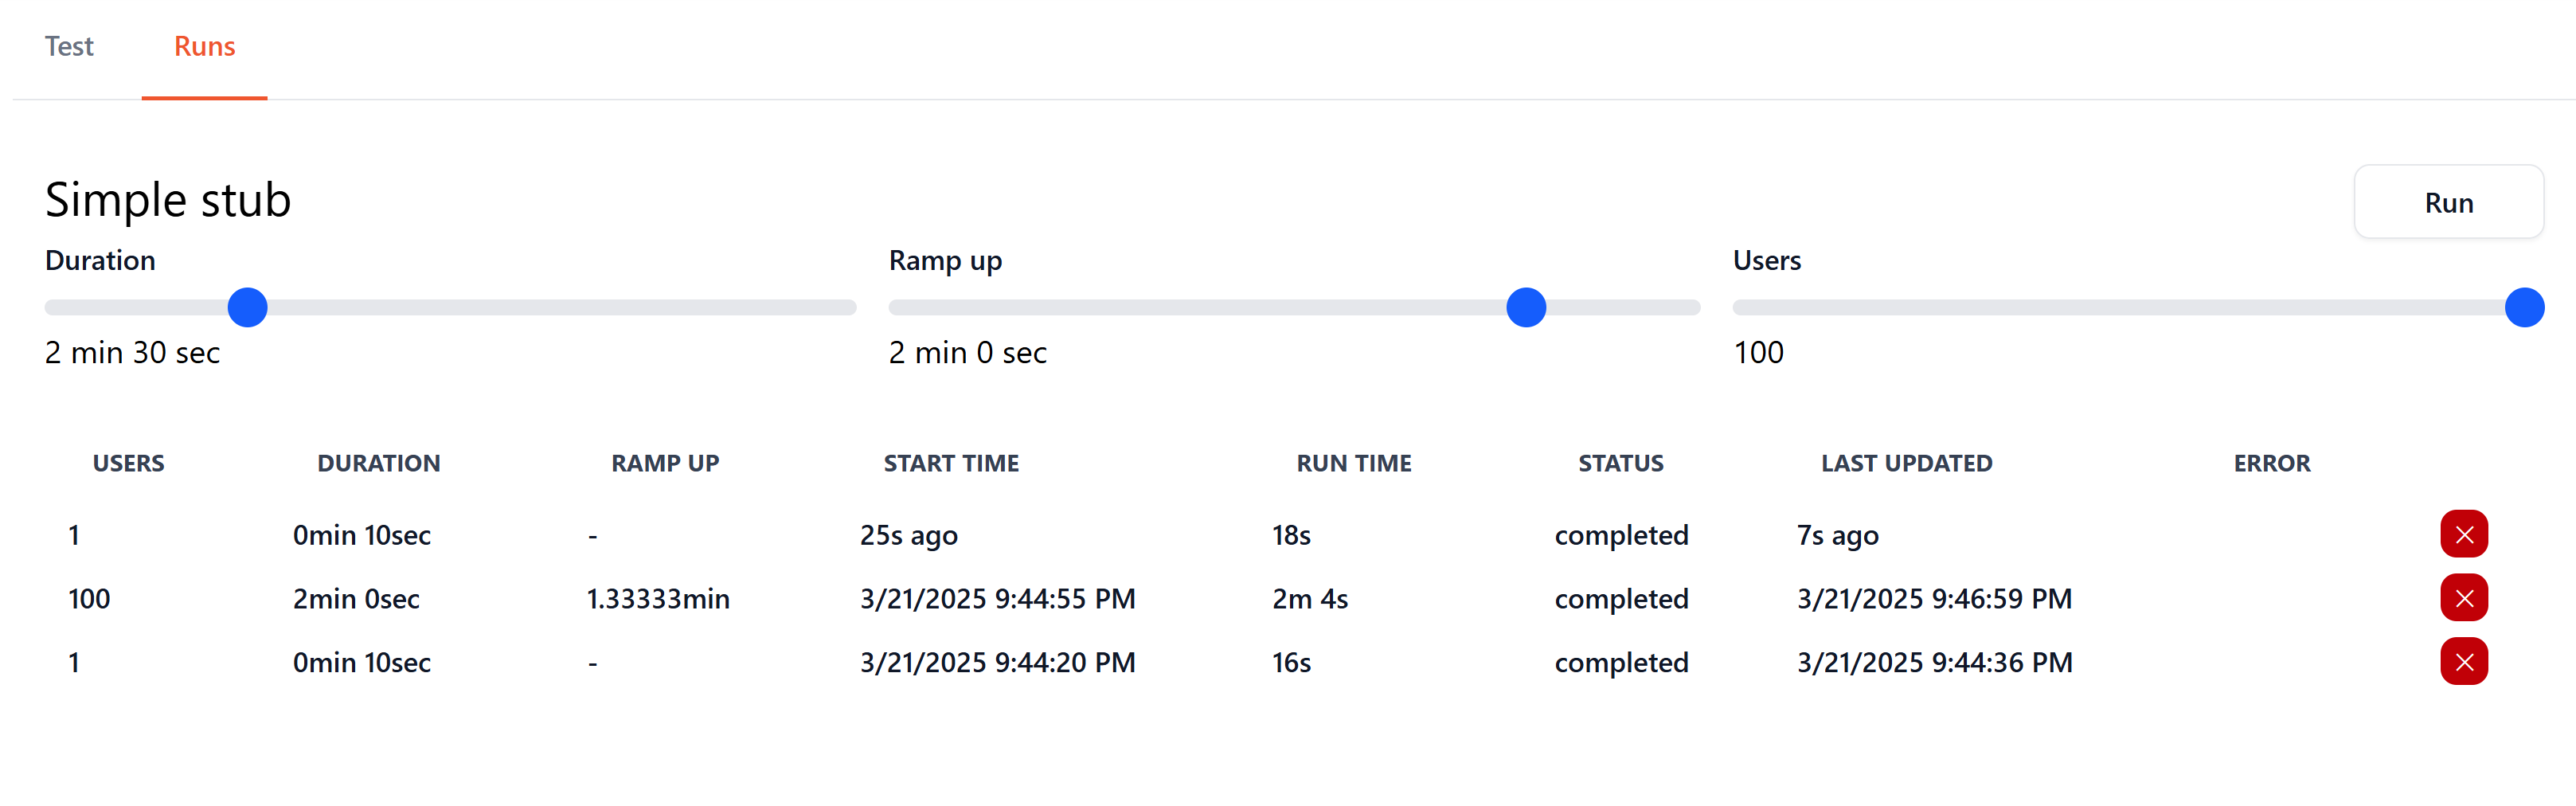
Test Execution Settings
- Number of Users: The number of users to simulate.
- Duration: The duration of the test in seconds.
- Ramp-Up Time: The time in seconds to gradually increase to the specified number of users.
- Processes: The number of processes across running agents to use for the test execution.
Screen Actions
- Click the
Schedulebutton to start a test execution.
Test actions
- Click the
Stopbutton to cancel a running test execution. - Click the
Deletebutton to remove a test execution. - Click on a test execution row to view detailed results.
Test Results
Overview
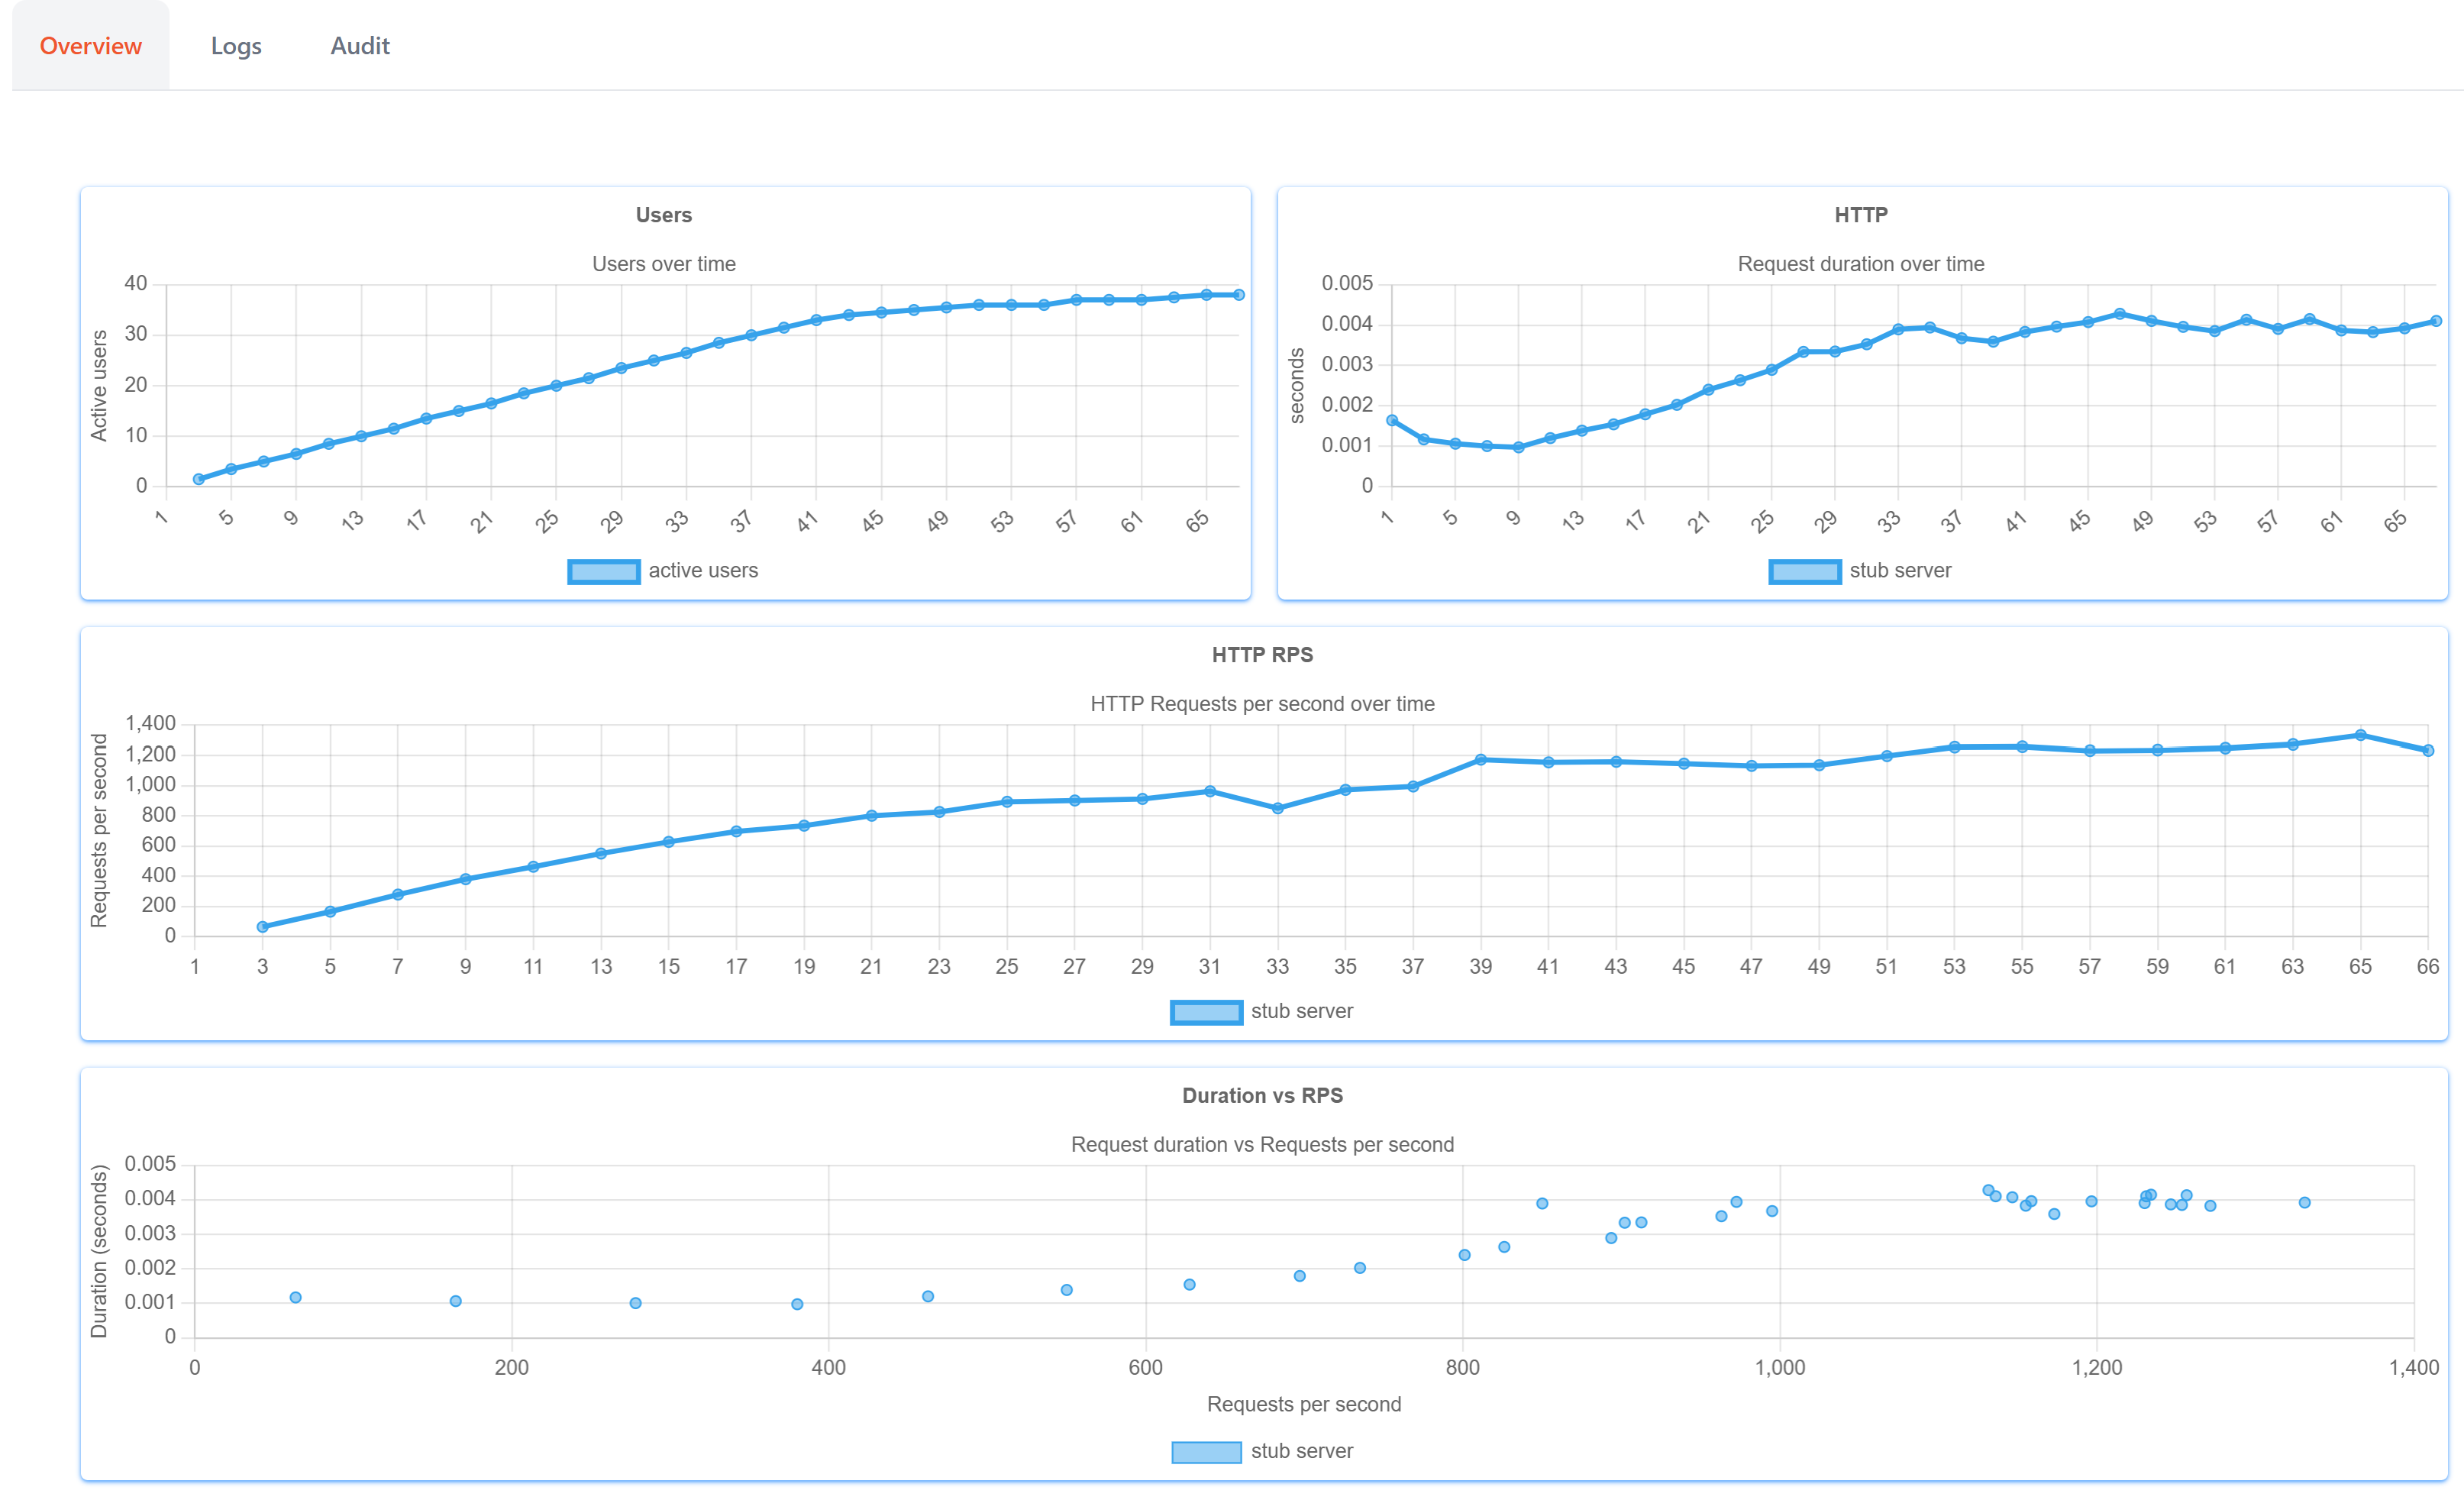
- This screen provides a real-time graphical representation of the test results.
Logs
- Open the "Logs" tab to view
console.logorprintmessages generated during the test execution.
Audit
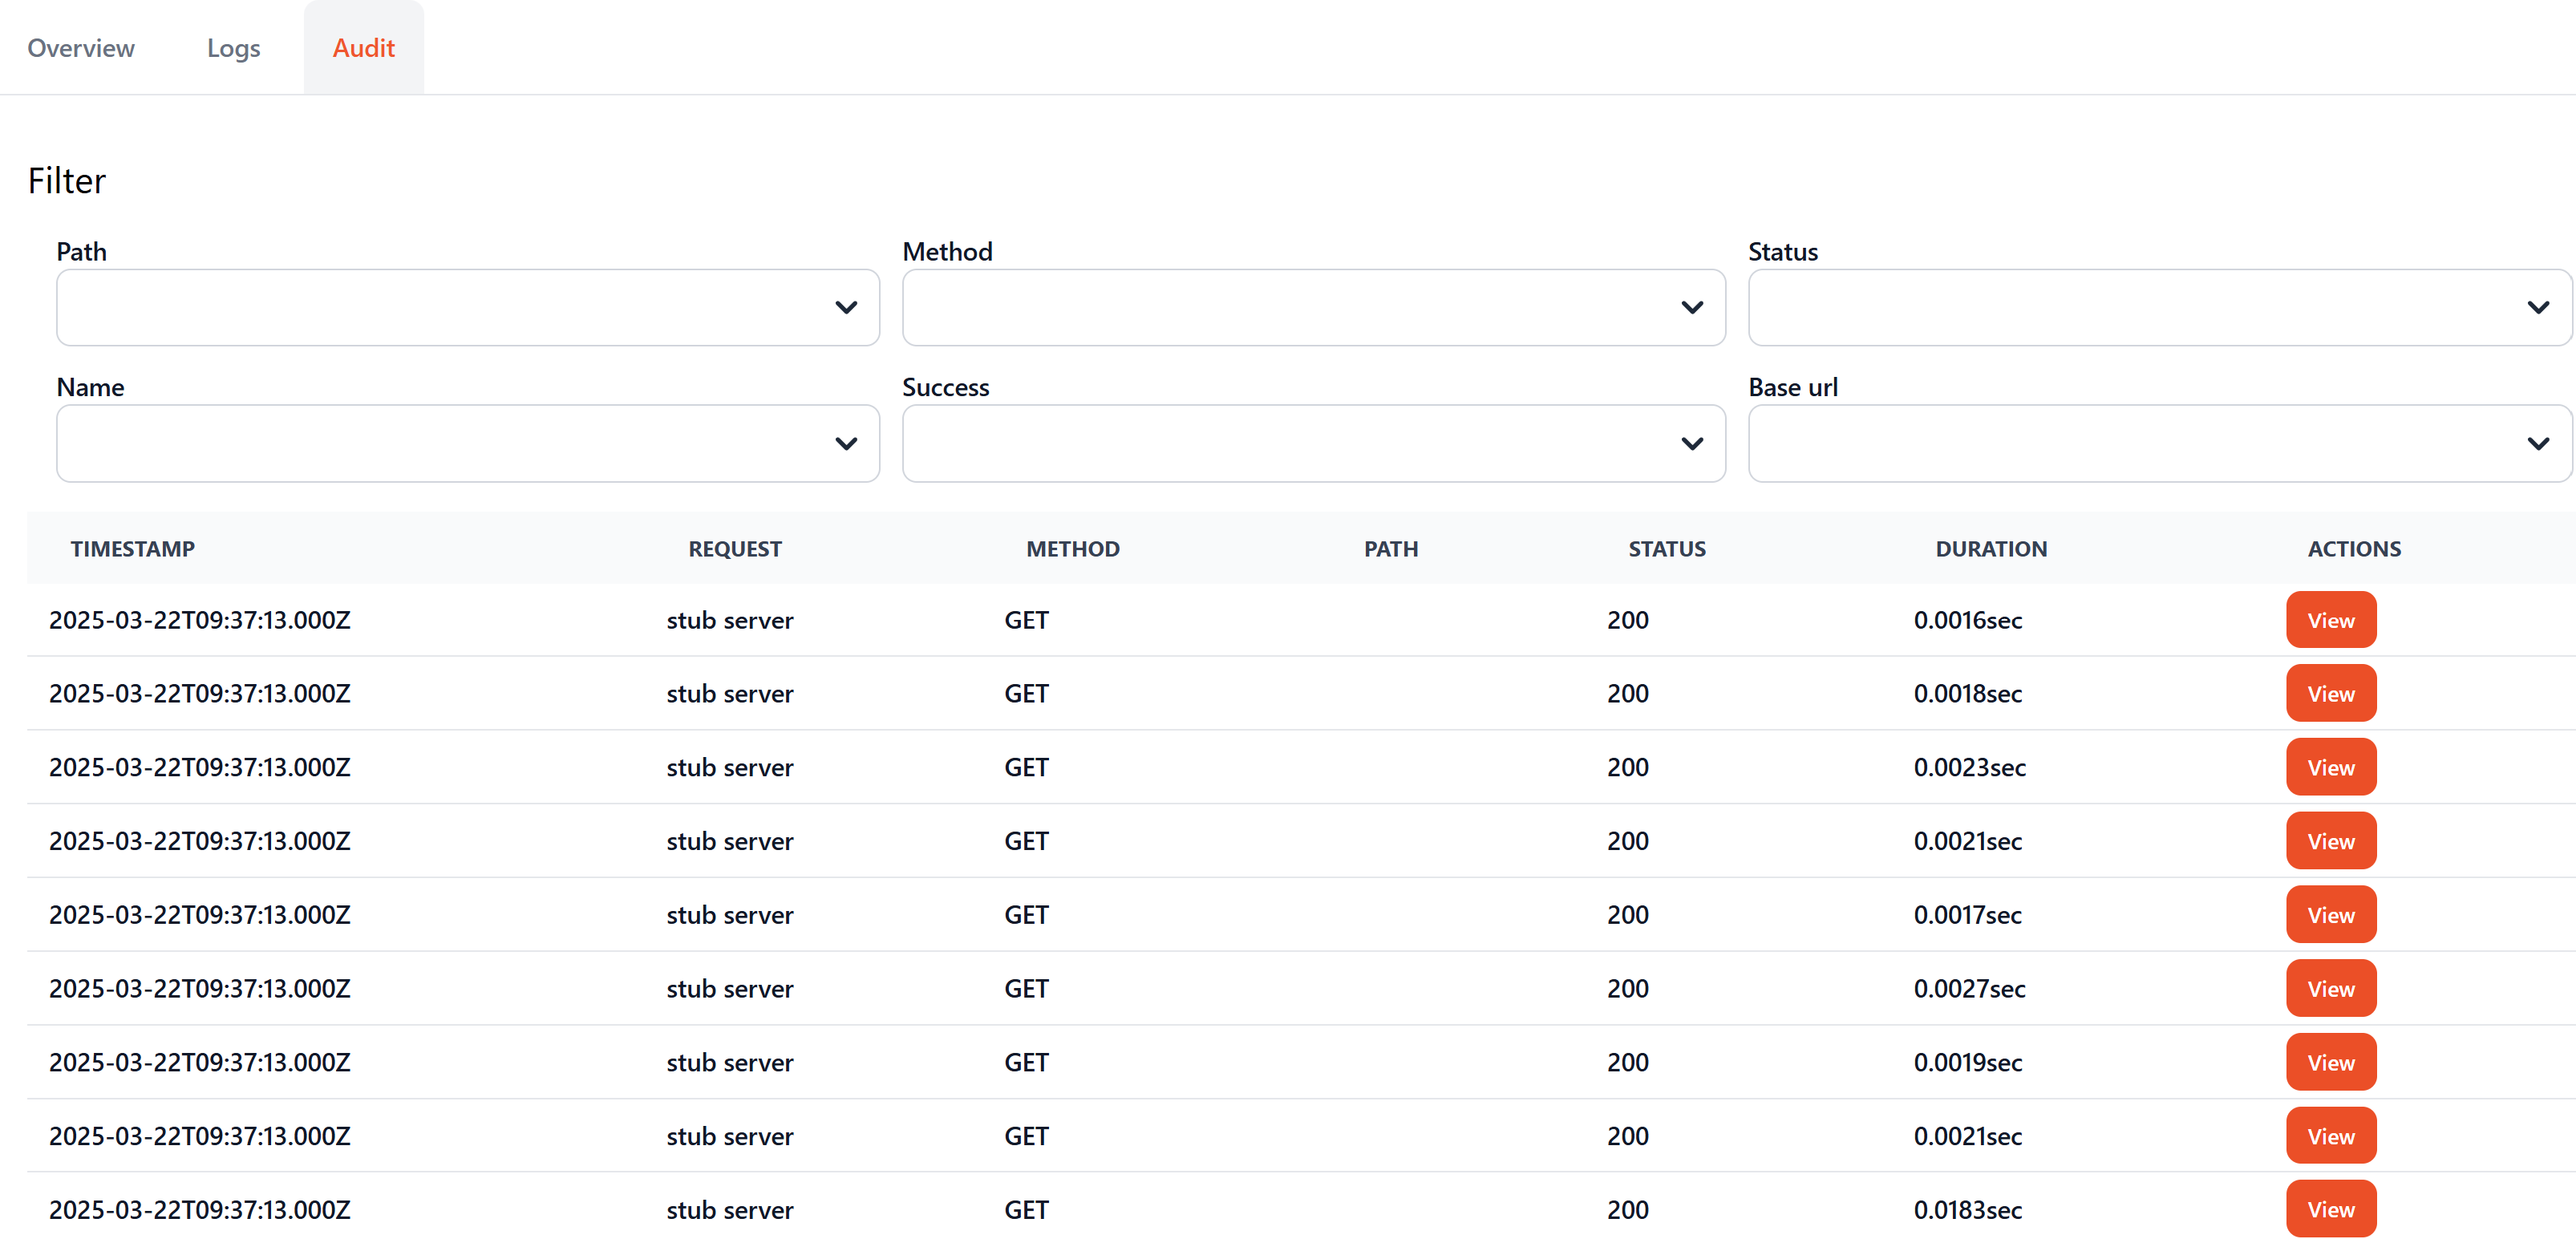
- The "Audit" section displays detailed information about the HTTP requests sent during the test execution.